
Live Streaming Tips
With covid-19 disrupting life as we know it people are turning to technology to get creative and bridge the gap created by social isolation.
If you’re a videographer or a production company live streaming could be a great service to offer people to help them out in these testing times. I’ve put together a few hopefully helpful bits of info on how I currently do live streams.
This is aimed at videographers/production companies who already own cameras and just need a few extras to get going. You can use the following with a DSLR or a cine camera, basically any camera that has a clean HDMI or SDI output. This is a mac based workflow.
Equipment You Need
Camera(s)
A DSLR or Cine Camera. in this example we will show both the A7sii and the URSA Mini Pro G2.

The G2 is a good camera to stream with as it has 2 x SDI outputs. One for monitoring, one for streaming.

Make sure you get a long SDI lead that allows you enough distance to get creative and not restrict camera placement.
Most DSLR cameras have HDMI outputs . The workflow detailed here can work with either SDI or HDMI or a combination of both if you want to stream with 2 angles.

A7sii with the HDMI output.
Converter
Now you have your cameras hooked up to the necessary leads you will need to convert the video signals for your computer to accept the video input. You can’t just plug your SDI/ HDMI directly into your laptop unfortunately!
We use the Blackmagic ultra studio mini recorder this can be used with any camera brand, again anything with HDMI or SDI.

One of these converters is around £130 in the UK

Connect the converter to your computer via thunderbolt (these can be converted if needed)
My MacBook Pro 2015 has 2 x thunderbolt inputs so I can stream 2 cameras. If you just need one angle then keep it simple but having the option of 2 angles will bring a professional edge to the production value.
Audio Interface
You definitely don’t want the audio to change every time you cut between angles which is what will happen if you use the onboard mics on each camera you’re streaming from.
If you are using just 1 camera it’s not as essential to use a seperate audio device, especially if you have XLR inputs in the camera like the G2.

The Zoom H4N can be used as a USB audio device.

You can use higher quality microphones if you use XLRs
Most video guys I work with already own a Zoom h4n, if you have one of these you already have the kit you need. This will be connected to your Mac via usb and used not as a recorder but as a sound interface. It’s an overlooked feature of the h4n!
Software
To select either SDI or HDMI on your converter (it doesn’t automatically select what your plug in) you need an app called Blackmagic Desktop Video Setup. It is simple to use and its free.

Choose SDI or HDMI
Now that is sorted the app I use to actually create a live stream is free and is called OBS Studio.
There are plenty of tutorials out there to get to grips with OBS but it is fairly simple. Make sure you are outputting the same frame rate and resolution from each camera and set up OBS accordingly.
Once you have everything setup you can preview your shot on the left and the right hand screen is what is actually live. The gif below shows the cut between the wide angle from the URSA and the zoomed in shot from the A7sii.

OBS user interface.
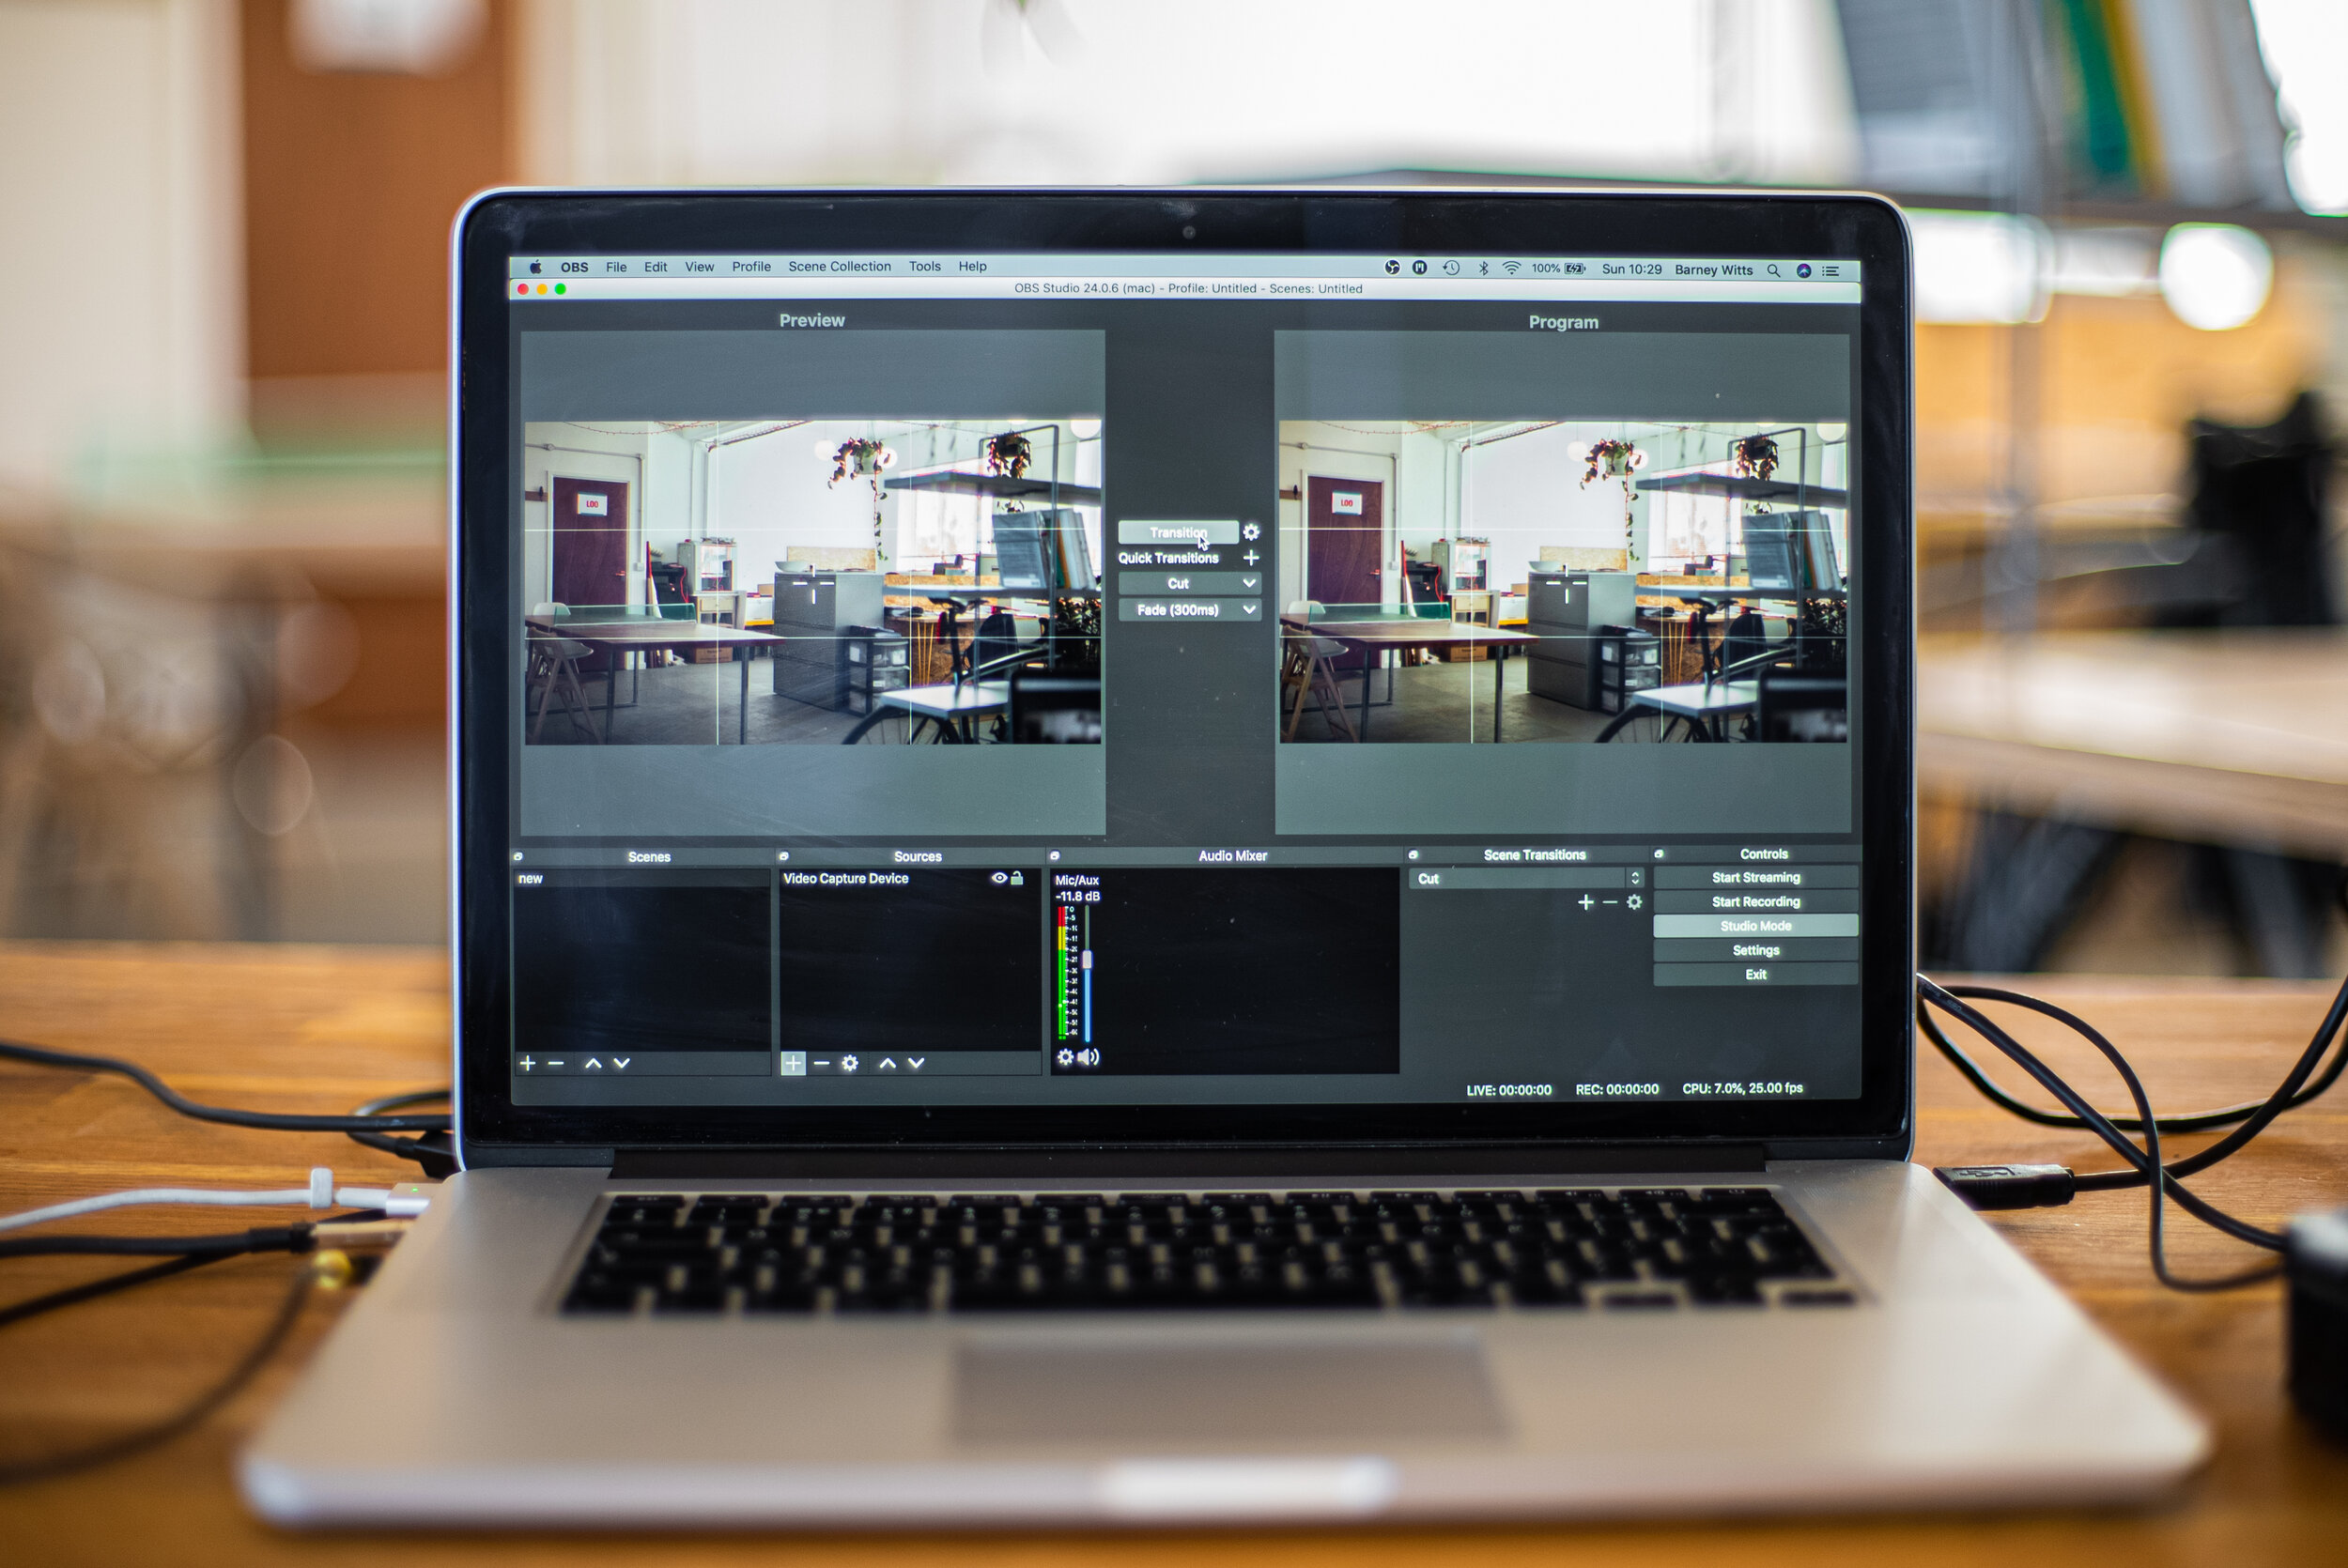
Turn off any overlays you are outputting, you can still see the grid lines turned on here
If you are using the Zoom H4N or any other sound card interface, make sure you add it as an extra source on both cameras and turn down both cameras audio in the audio mixer. This will leave you with the clean Zoom audio on both sources so when you cut there is no audible difference.
One final step for audio is to add a delay on to the audio source so that everything is in synch. There is nothing worse than out of time audio to visuals and people will turn off! I add a delay of 300ms and this normally works perfectly - to test do a clap and see if everything is good.
Get Streaming
The final step is to connect OBS to your streaming platform of choice (Facebook in this example). Go to start a live stream in facebook and look out for the ‘Stream Key’ you will need to copy this.
Then in OBS go to preferences - ‘stream’ tab. All you have to do is pick your platform (in this example its facebook live) and paste the stream key.

Copy the streak Key (blanked out)

Paste it into OBS.
This is just a rough guide but hopefully gives a good overview on what you need to start streaming. This workflow makes the most of kit that most one man band or small production companies already have in their arsenal so hopefully with a quick purchase of the converter and a few leads you will be ready to start helping clients out.
Everybody stay safe out there,
Barney